 Bokeping
Connect an AI assistant to Bokeping
Add Bokeping to Claude, Claude Code, Codex, Cursor, or VS Code, then approve access to one company.
Connecting takes a few minutes. You add Bokeping’s address to your AI app, sign in to Bokeping in your browser, choose one company, and choose what the assistant may do. Bokeping never asks you to copy a password or an API key into the AI app.
Before you start
Section titled “Before you start”- Sign in to Bokeping at least once, and make sure you can open the company you want to connect.
- Use an AI app that supports remote MCP servers with sign-in. The steps below are checked for Claude (web and desktop), Claude Code, Codex, Cursor, and VS Code. Other apps with the same support, such as ChatGPT where your plan offers custom connectors, may work too, but Bokeping has not checked them yet.
- If you are an external accountant for the company, or the company requires two-step verification, turn on two-step verification under Profile → Security first. Without it, Bokeping refuses the connection.
Bokeping’s MCP address is:
https://app.bokeping.com/mcpThe Bokeping MCP page has the same instructions with copy buttons.
Step 1: Add Bokeping to your AI app
Section titled “Step 1: Add Bokeping to your AI app”Claude (claude.ai and Claude desktop)
Section titled “Claude (claude.ai and Claude desktop)”- Open Settings → Connectors.
- Choose Add custom connector.
- Name it Bokeping, paste the address above, and add it.
- Choose Connect. A browser window opens at Bokeping.
If you use Claude through a company workspace, an administrator may need to add the connector before you can connect it.
Claude Code
Section titled “Claude Code”Run this in your terminal:
claude mcp add --transport http bokeping https://app.bokeping.com/mcpThen type /mcp in Claude Code, choose bokeping, and follow the sign-in prompt.
Run both commands. The second one asks for every Bokeping permission so that you can choose on the approval page. Permissions that change your books still start unticked there.
codex mcp add bokeping --url https://app.bokeping.com/mcp --oauth-client-registration dcr
codex mcp login bokeping --oauth-client-registration dcr \
  --scopes customers:read,vendors:read,invoices:read,bills:read,payments:read,expenses:read,items:read,accounts:read,reports:read,journals:read,transactions:read,banking:read,company:read,imports:read,period_close:read,tax:read,purchase_orders:read,inventory:read,customers:write,invoices:write,bills:write,expenses:write,vendors:write,items:write,purchase_orders:write,imports:write,journals:write,financial_activity:read,files:read,attachments:write
Cursor
Section titled “Cursor”Add Bokeping to ~/.cursor/mcp.json:
{
  "mcpServers": {
    "bokeping": {
      "url": "https://app.bokeping.com/mcp"
    }
  }
}
VS Code
Section titled “VS Code”Add Bokeping to .vscode/mcp.json in your workspace:
{
  "servers": {
    "bokeping": {
      "type": "http",
      "url": "https://app.bokeping.com/mcp"
    }
  }
}
In Cursor and VS Code, start the server from the MCP view and sign in when prompted.
Step 2: Sign in and choose the company
Section titled “Step 2: Sign in and choose the company”Your AI app opens Bokeping’s Connect an Agent page in your browser. Sign in if asked.
- Read the notice at the top. This Agent registered itself with Bokeping and has not been reviewed by Bokeping is normal for an assistant you just added yourself. If you did not start this connection, choose Deny.
- Under Choose the company this Agent can access, pick the company. Your role in each company is shown next to its name. The assistant can never read more than that role allows.
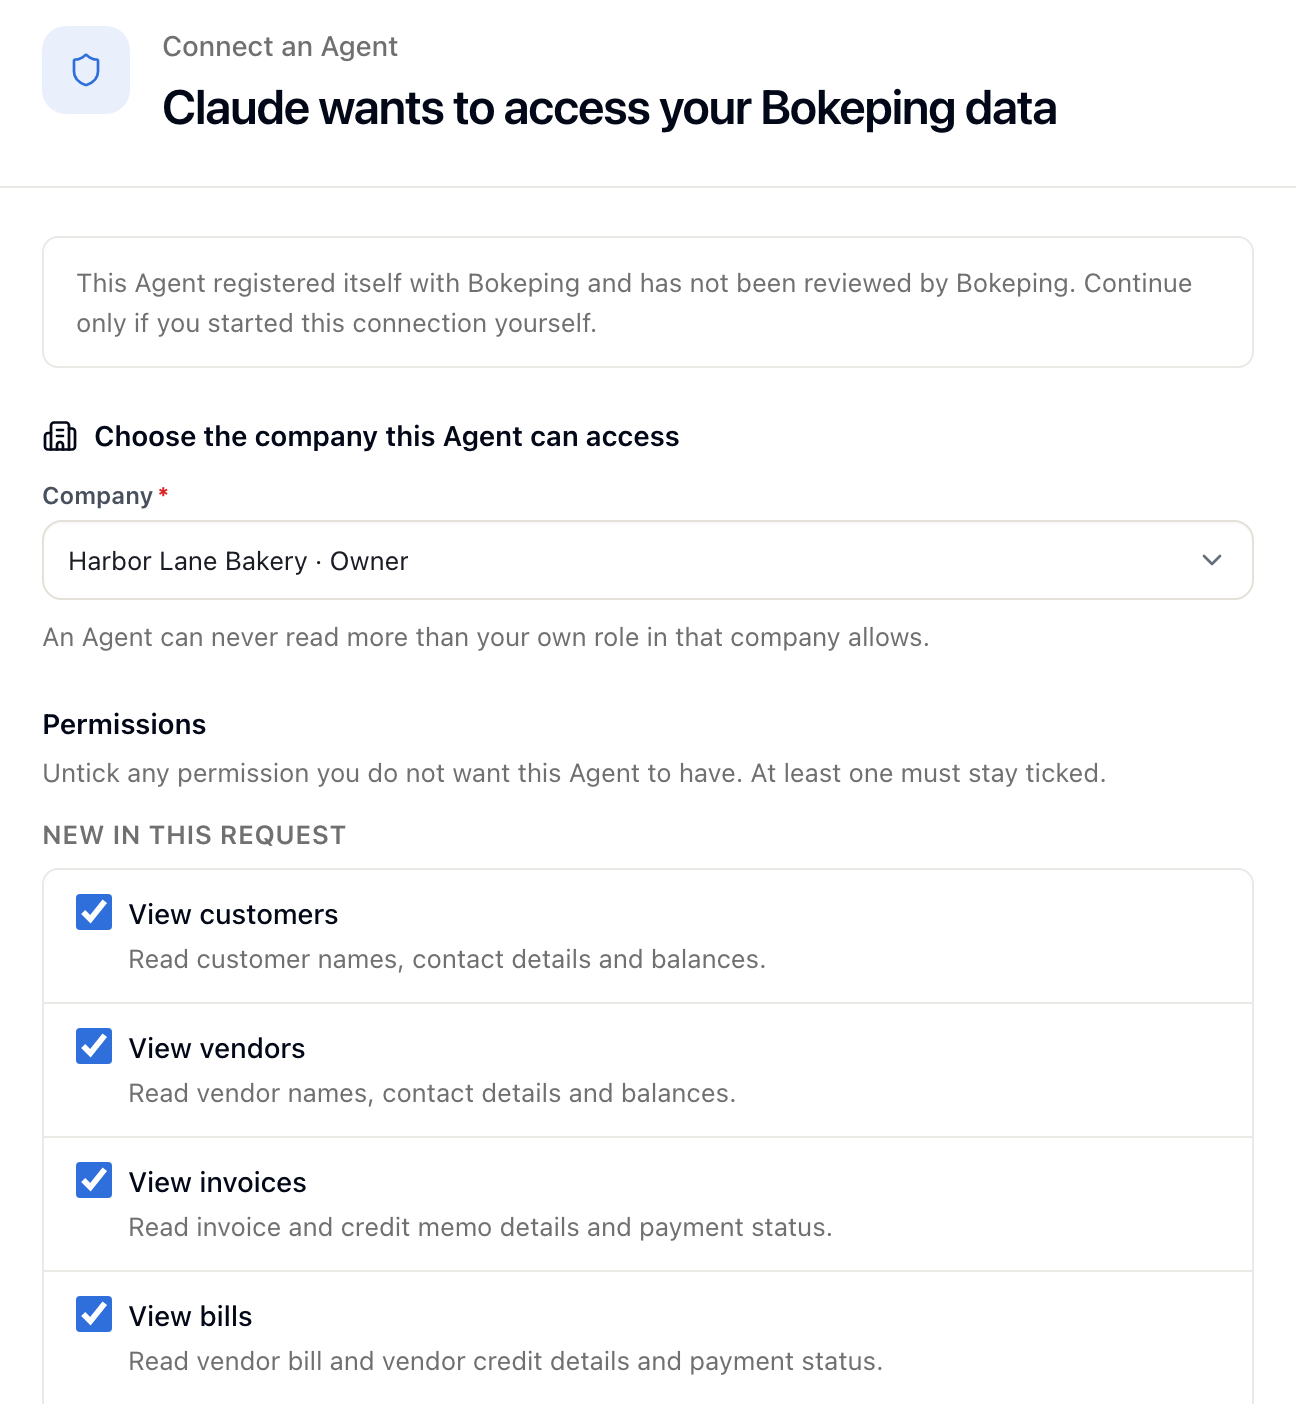
Demo connection for the fictional company Harbor Lane Bakery. The read permissions shown were requested by the AI app and can be unticked before approving.
Step 3: Choose the permissions
Section titled “Step 3: Choose the permissions”The page lists every permission the AI app asked for:
- New in this request: read permissions start ticked. Untick any you do not want. At least one must stay ticked.
- Already granted: appears when you reconnect the same app to the same company. Untick one to take it back.
- Can change your books: permissions such as Create draft invoices start unticked. Tick only the ones you want. Even then, the assistant shows you each record and waits for your yes, and invoices, bills, expenses, and purchase orders are only ever saved as drafts.
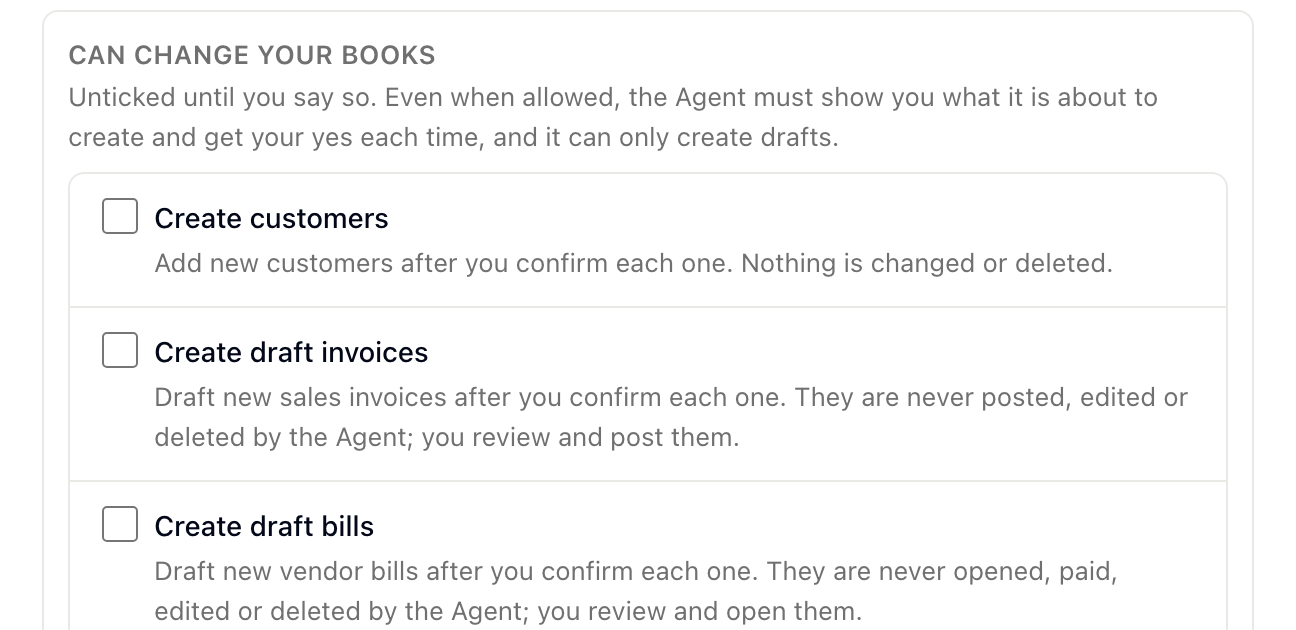
Permissions that change your books start unticked. Shown on the same demo request.
Not sure what a permission covers? Each one has a description on the page, and Permissions and privacy lists them all. You can remove permissions later without reconnecting, so starting with fewer is fine.
Step 4: Review and allow access
Section titled “Step 4: Review and allow access”- Check the count, for example 20 of 30 permissions will be granted.
- Read the data notice: Everything this Agent reads is sent to the AI service you use with it. Full tax IDs, bank account and routing numbers, card data, and access tokens are never included. It also says that Bokeping has no agreement with your AI provider: whether the provider keeps your data or uses it to train its models depends on your account there, and a business plan or turning training off usually keeps it out of training.
- Check After you decide, you will return to…. For Claude on the web or desktop it is
claude.ai. For an app on your computer, such as Claude Code or Codex, it is a local address such as127.0.0.1orlocalhostwith a port number. - Choose Allow access.
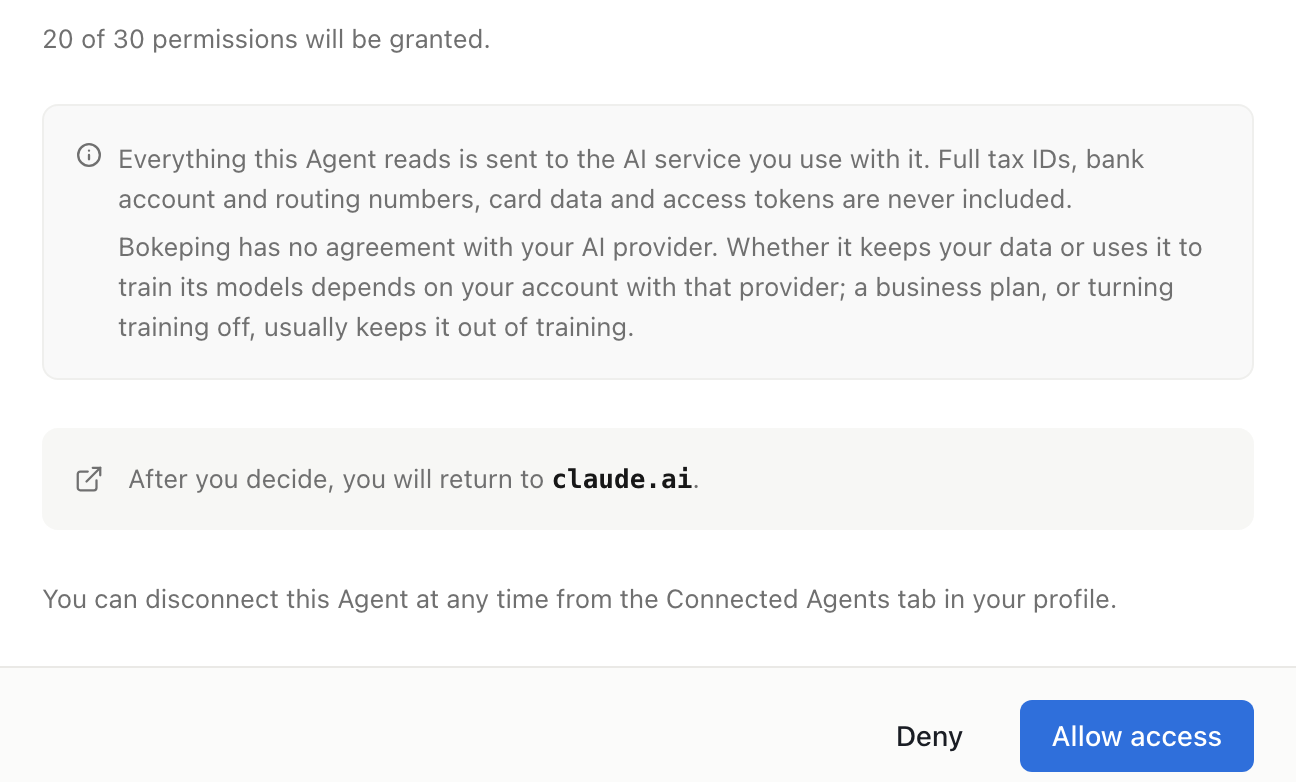
Approval summary for the demo Claude connection. The return address shows which app receives the connection.
If the company’s owner or an admin has turned off ledger detail for AI agents, the page says so before you approve. The assistant then receives counts, statuses, and problem summaries only. See Permissions and privacy.
Step 5: Confirm it works
Section titled “Step 5: Confirm it works”Back in your AI app, ask:
Which Bokeping company and permissions is this connection using?
The assistant checks the connection and names your Bokeping account, the company, and the permissions you granted. Then ask a real question, such as “What were our sales last month?”
The connection now appears in Bokeping under Account menu → Profile → Connected Agents.
Work with more than one company
Section titled “Work with more than one company”Each connection covers one company. To work in a different company, reconnect from your AI app and pick the other company on the approval page. Some apps keep only their newest connection, so the earlier company’s entry can stay listed as Active in Connected Agents without being used, until it shows Expired after 30 days. Revoke it if you no longer need it.
Reconnecting to the same company replaces the earlier connection. Permissions you already granted stay ticked, so you lose nothing.
Sign in again after 30 days
Section titled “Sign in again after 30 days”For your security, a connection lasts 30 days from the day you approved it, even if you use it every day. After that, Connected Agents shows it as Expired and your AI app asks you to sign in to Bokeping again. Approve the connection the same way. Your earlier permissions start ticked.
If something does not work, see Fix AI assistant connection problems.